Interactive SPARQL Query Builder: Basic Tutorial
- Creating RDF Instance Data using iSPARQL
- Querying
- Saving the Graph Model
- Generating a SPARQL Query from the Graph Model
- Setting Results Rows
- Adding a dataset
- Other iSPARQL Features
- Auto arrange the Graph Model
- Group selected nodes of the Graph Model
- Add Named Graph(s) to the SPARQL query
- Add statement to the SPARQL query
- Related
Creating RDF Instance Data using iSPARQL
- Go to http://cname/isparql, for ex. http://id.myopenlink.net/isparql
- The iSPARQL initialization window will be shown:

- Finally will be presented the iSPARQL Advanced tab open with a default SPARQL query:
SELECT * WHERE {?s ?p ?o}

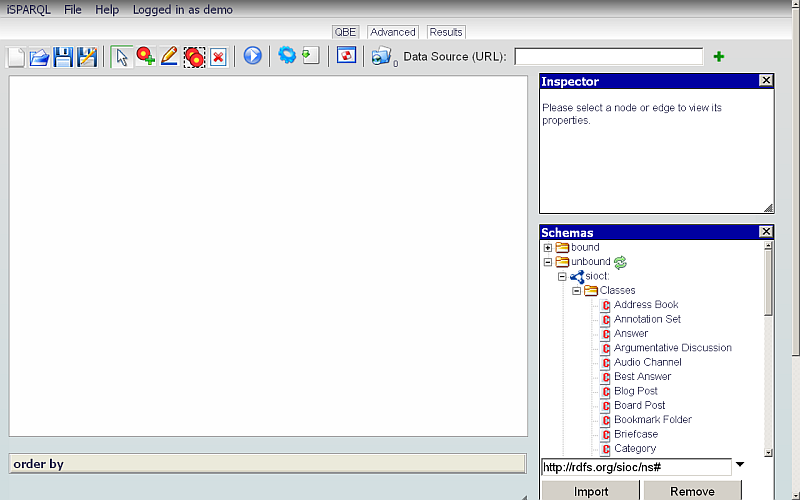
- Go to QBE tab:
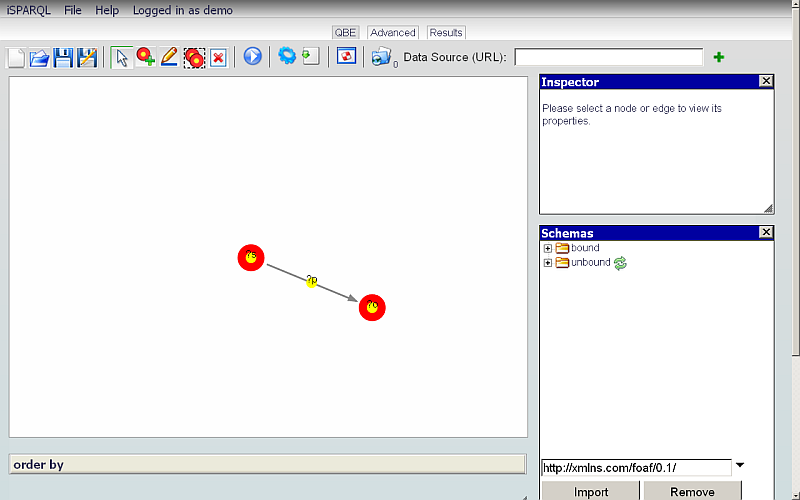
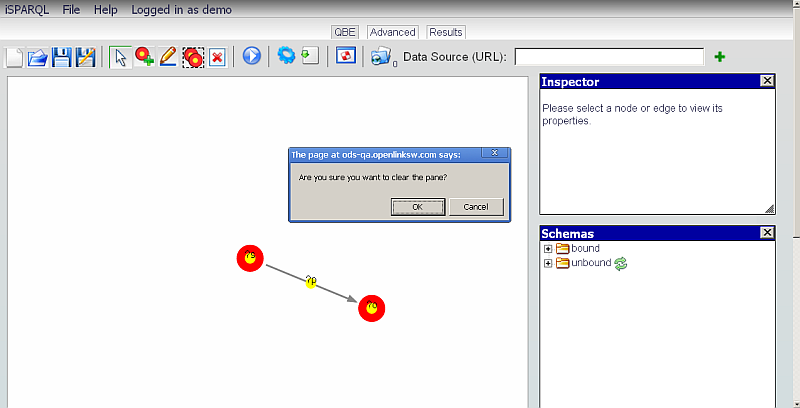
- Click the Clear Pane icon on the toolbar to empty the Canvas.
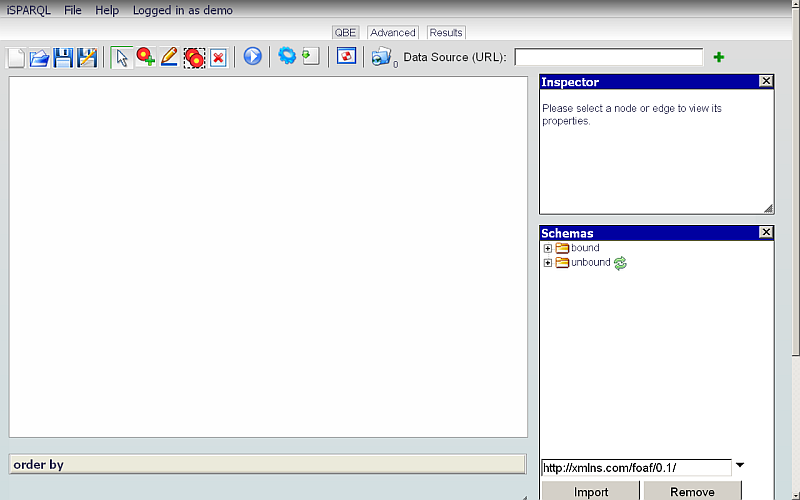
- Next we will import the Schemas that contain the Terms to be used in the our Graph Pattern. In the Schemas pane enter http://rdfs.org/sioc/types# and click the "Import" button. Perform the same steps for the schema with URL: http://rdfs.org/sioc/ns#
- As result the Schemas window under "unbound", you should now see the items sioct and sioc.
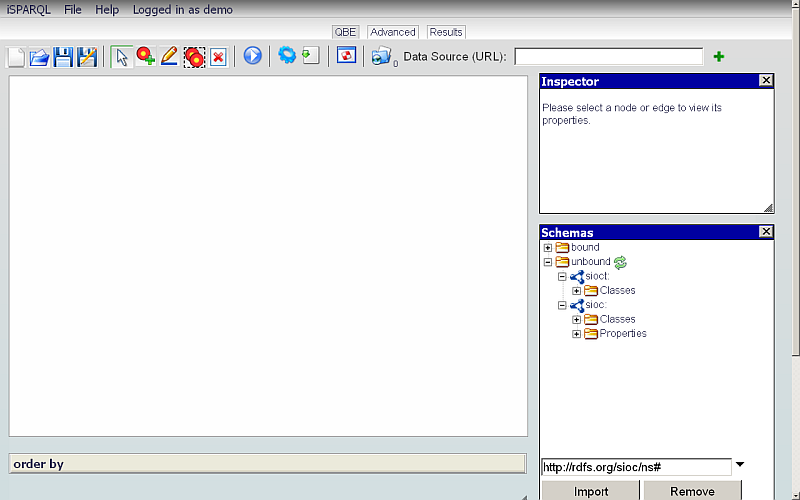
- Now click on the sioct -> Classes -> + icon in order to expand the classes list:
- Scroll down the shown list and drag-and-drop the Subject Node Weblog onto the QBE working Canvas.
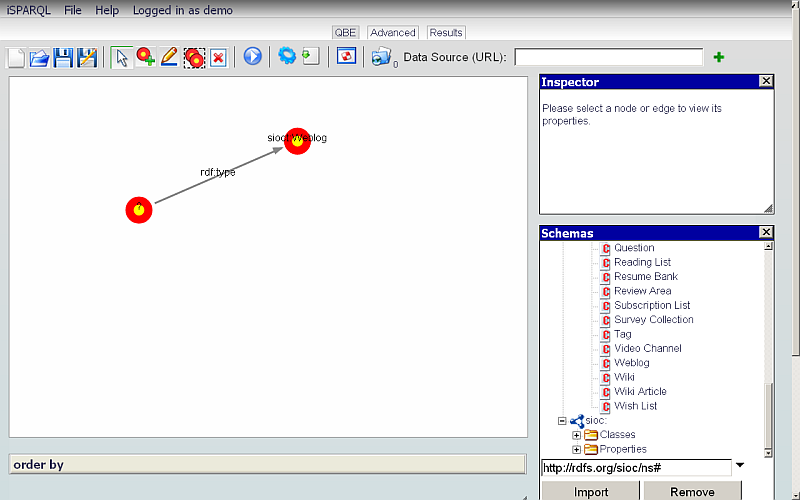
- As result should be created a Subject node of Datatype sioct:Weblog at the point you dropped it.
- The properties of the selected node are shown in the Subject Node pane where you can:
- Change the Node type to URI or Literal;
- Change the Node Variable label value;
- Set the Node Datatype;
- Set the visibility property of the variable by hatching the "Visible?" check-box;
- Set participation in the "Order By" clause bz hatching the "Order By" check-box:

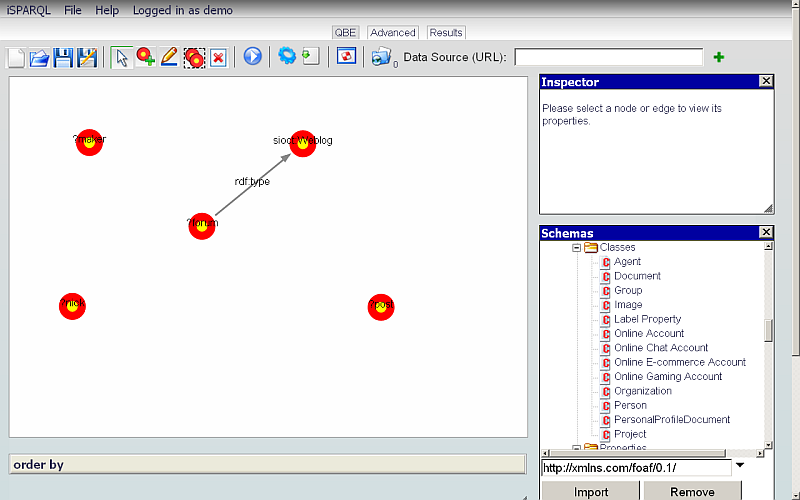
- You can add a new node from the QBE toolbar.
Click the Add mode icon, and drag-and-drop an Object Node onto the Canvas.

- In the Object Node pane, change the type to Literal and change the Variable label value to ?s.

- You can add a Datatype to a node through the Schemas pane or enter it manually.
To use the Schemas pane --
- Import the schema that contains the terms you wish to use in your Graph Pattern.
For ex.
import the foaf schema: http://xmlns.com/foaf/0.1/

- Drag-and-drop the Class Document item from the Concepts list over the Node with Literal type that we created above.
- You should now see that the Datatype in the Node pane for the selected node has changed, from Literal to foaf:Document.

- Import the schema that contains the terms you wish to use in your Graph Pattern.
For ex.
import the foaf schema: http://xmlns.com/foaf/0.1/
- To delete a node, select the desired node, e.g., the Node with Variable label ?s, and click the Remove button in the QBE toolbar.
You will be prompted to verify deletion.
Click OK to delete.

- You can add more nodes:
-
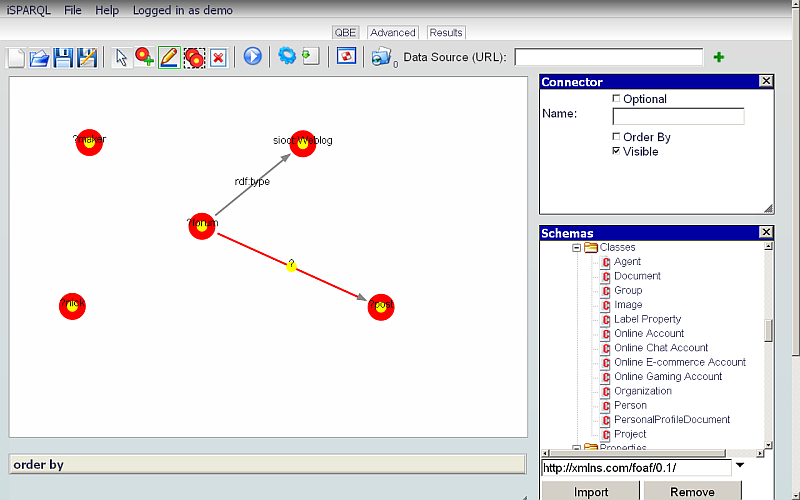
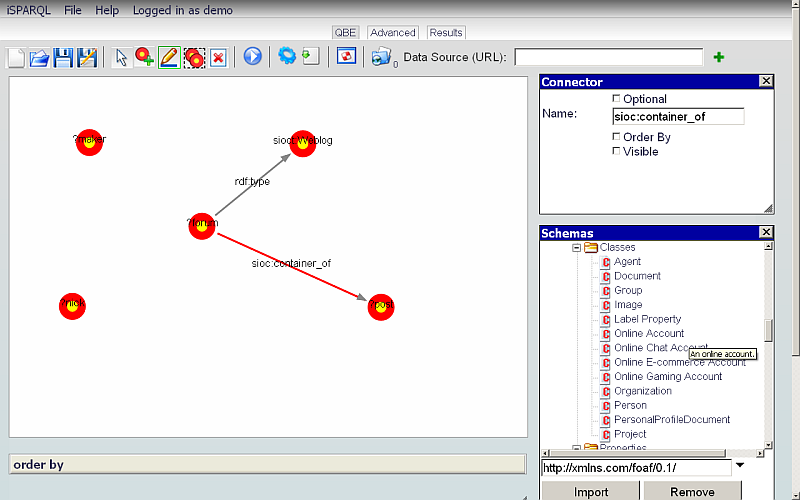
Add connections by clicking the Connector icon on the QBE toolbar and drag from one node to another.
- For example, drag a connection from the node with Variable label ?forum to the ?post node.
- A connection will now be shown between the two nodes and a Connector pane will be shown above the Schema pane; this is the property window for the currently selected connection.
- Enter for Name for ex.
sioc:container_of and un-hatch the Visible? check-box.
- Click the Connector icon from the QBE toolbar and drag from the ?post node to to the ?maker node.

- In the Connector pane, check the Optional? check-box and un-hatch the Visible? check-box.
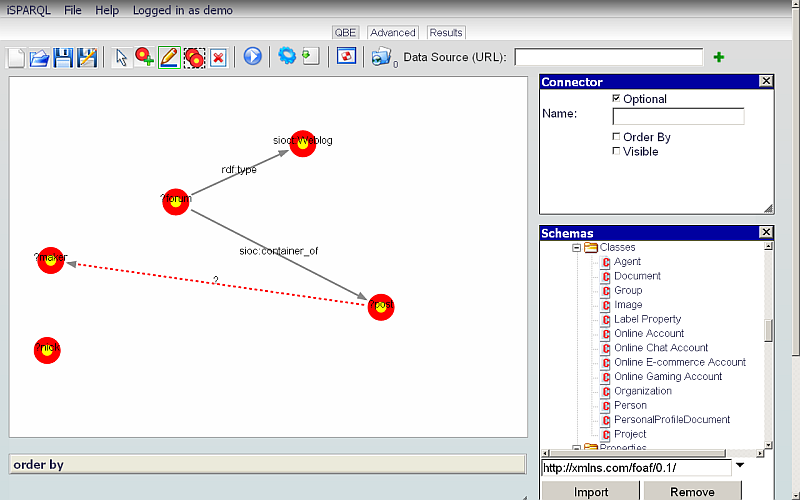
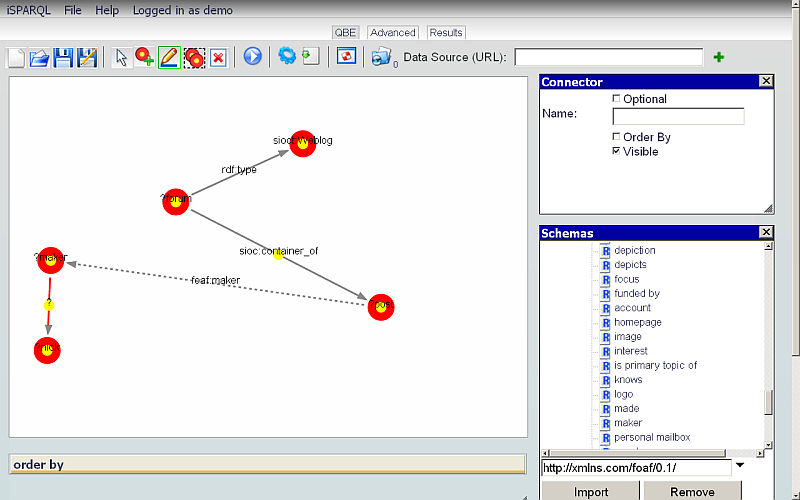
- Now we will add a type (from the foaf schema) to this connection. The type can be an Attribute (A) or Relationship (R) property from the Schema pane. "Attribute" (A) items are shown under each imported Schema's Properties with a green letter "A" icon. "Relationship" (R) items are shown under each imported Schema's Properties with a blue letter "R" icon. In the Schemas pane, go to foaf -> Properties and drag the "Relationship" (R) property maker onto the selected connection on the Canvas.
- In the Connector pane, the value of the Name field will change to foaf:maker.
Note that the connection line between the nodes ?post and ?maker is not solid, because we set it to be optional in the Connector window:

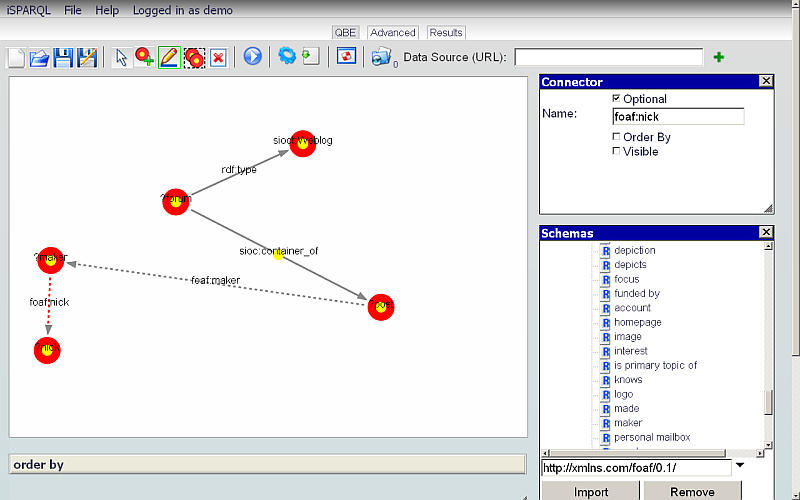
- Click the "Connector" icon from the QBE toolbar and drag from the ?maker node to the ?nick node.
- In the Connector window hatch the Optional? check-box and un-hatch the Visible? check-box.
Enter foaf:nick for Name.
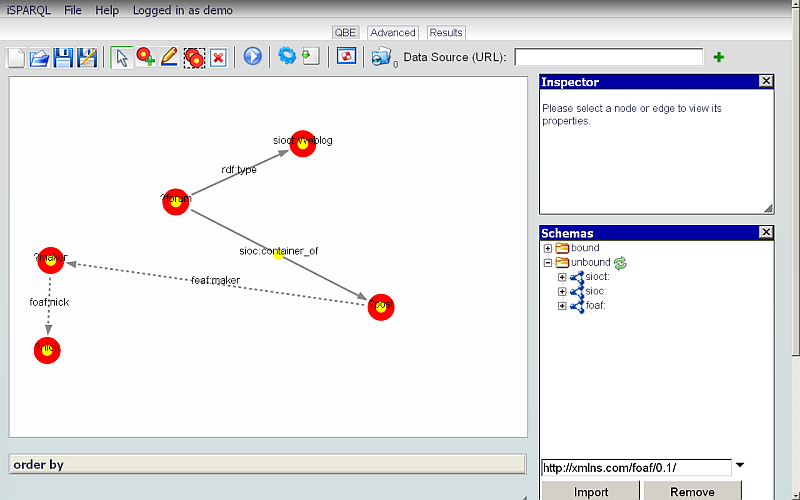
-
The Final Graph Model can be viewed in the QBE working pane.
Querying
- We now have the final graph model.
Before using it in a query, we need to set a proper target Graph URI.
For this, change the value in the Data Source URI field for ex.
to http://id.myopenlink.net/dataspace

- Click the Run Query button on the QBE toolbar.
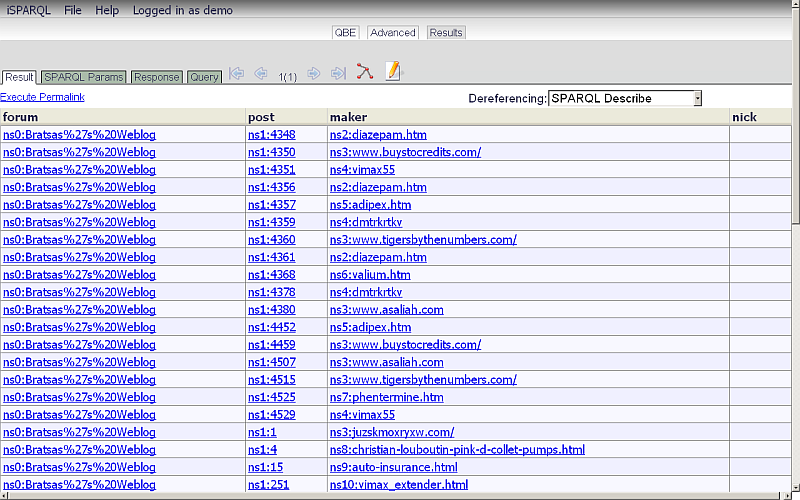
- The query results will be shown in the Results tab.
- You can also change dereferencing:
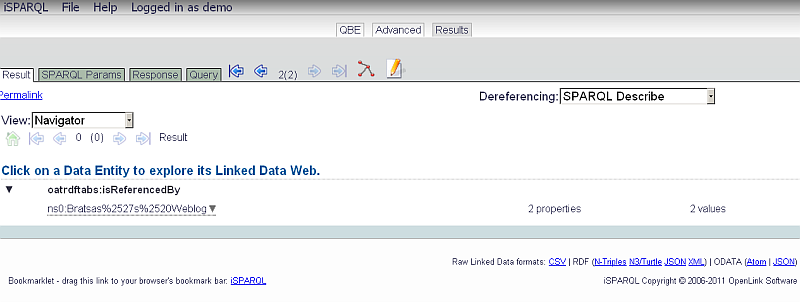
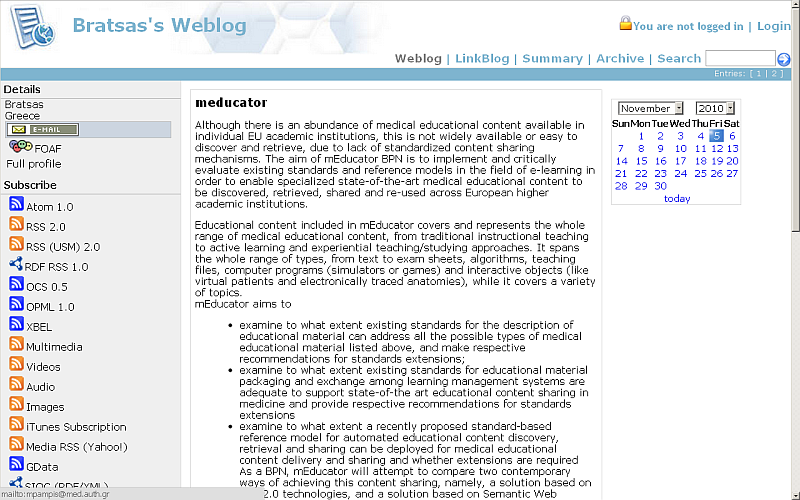
- "SPARQL Describe" ( by default ): for selected link of the result set performs describe, for ex.
for link "http://id.myopenlink.net/dataspace/Bratsas/weblog/Bratsas%27s%20Weblog":
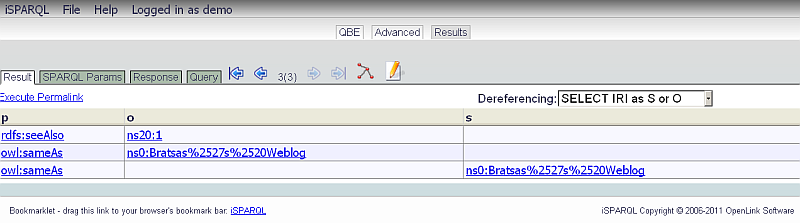
- "SELECT IRI as S or O": for selected link of the result set performs select IRI as S or O, for ex.
for link "http://id.myopenlink.net/dataspace/Bratsas/weblog/Bratsas%27s%20Weblog":
- "GET PAGE": for selected link of the result set performs redirect to this link, for ex.
for link "http://id.myopenlink.net/dataspace/Bratsas/weblog/Bratsas%27s%20Weblog":
- "Use Virtuoso Web Service", for selected link of the result set performs Virtuoso Web Service execution, for ex.
link for "http://id.myopenlink.net/dataspace/Bratsas/weblog/Bratsas%27s%20Weblog":

- "SPARQL Describe" ( by default ): for selected link of the result set performs describe, for ex.
for link "http://id.myopenlink.net/dataspace/Bratsas/weblog/Bratsas%27s%20Weblog":
- View the SPARQL parameters values in the SPARQL Params sub-tab:

- View the response values from the Response sub-tab:

- View the SPARQL query produced from the graph model you have built from the Query sub-tab:

Saving the Graph Model
- Go to QBE tab and click the Save As icon from the QBE toolbar.
- As result should be shown the WebDAV Browser:
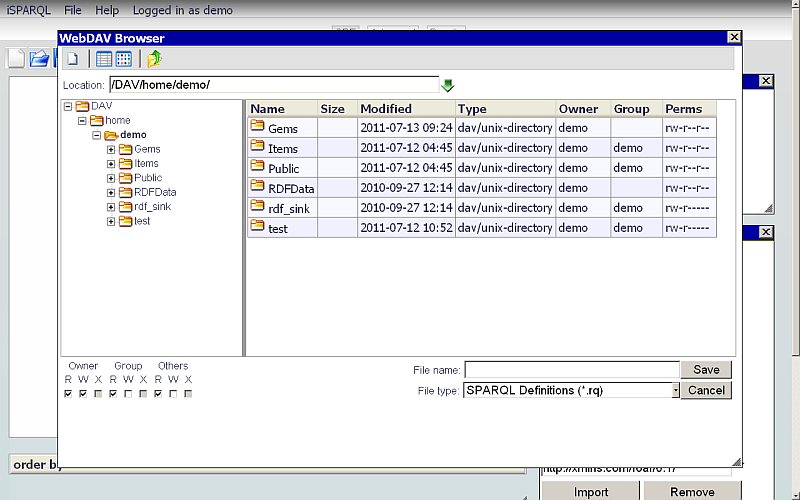
- Select a destination folder, input a file name, for e.g., MySimpleTest, and select SPARQL Definitions (*.rq) for File type.
You may also save the query in XML format, by choosing Dynamic Data Web Page (*.isparql) for File type.
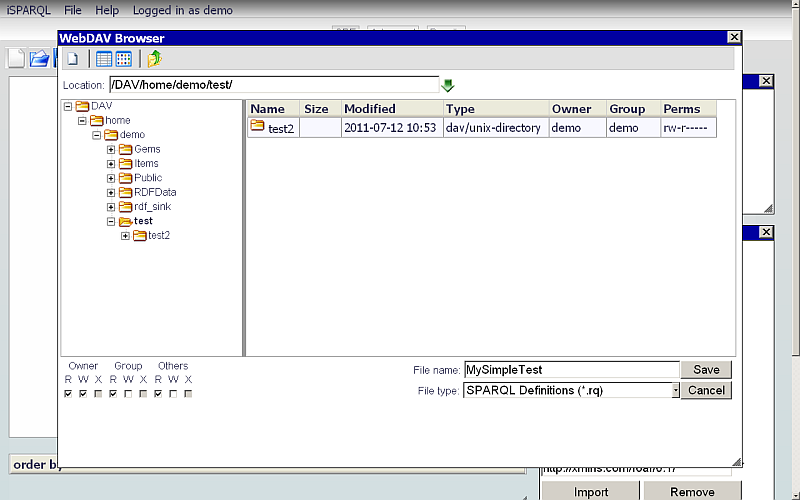
- Click "Save".
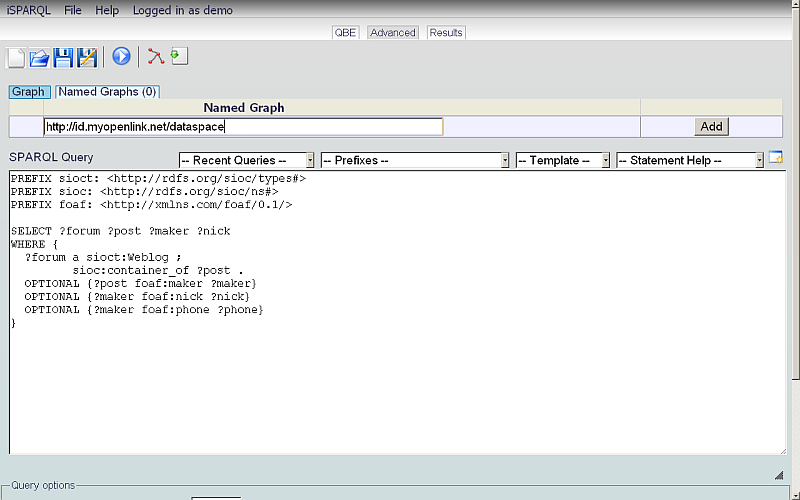
Generating a SPARQL Query from the Graph Model
- Go to QBE tab.
- Click the Generate icon on the toolbar.
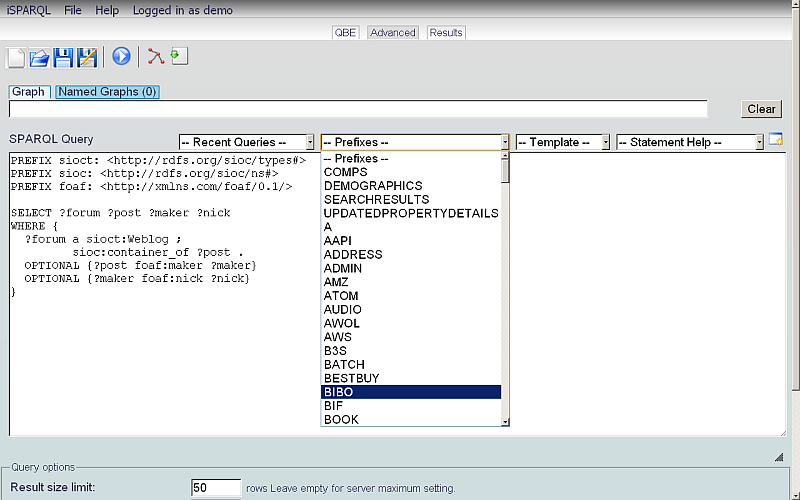
- The Advanced tab will open, with the query generated from your Graph in the SPARQL Query text-area.
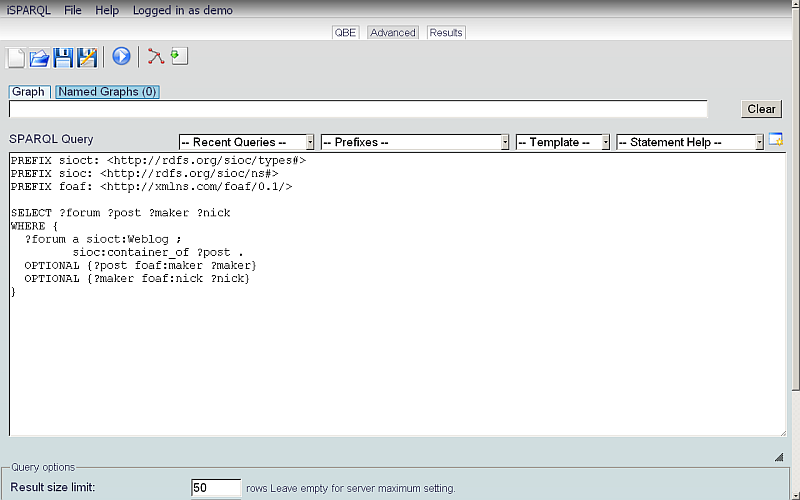
- Use the Prefixes, Templates, and Statement Help drop-down lists above the SPARQL Query text-area to format the query.
-
Note: You can revert your changes by clicking the "Get from QBE" button on the Advanced tab toolbar.
-
Note: You can revert your changes by clicking the "Get from QBE" button on the Advanced tab toolbar.
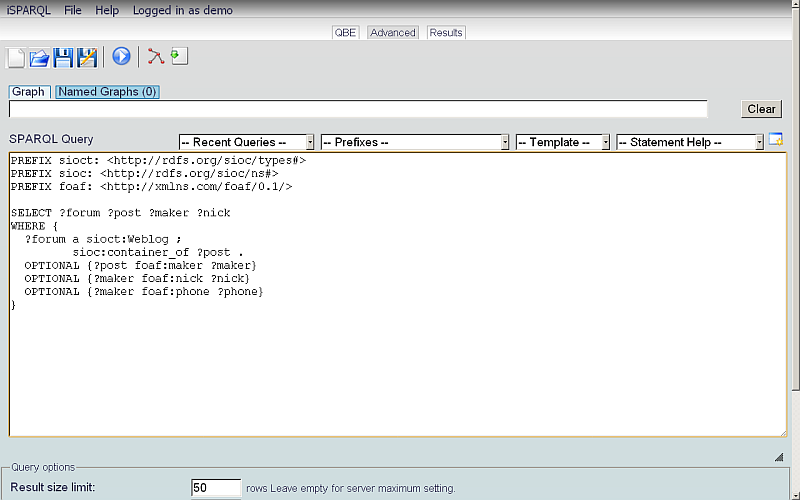
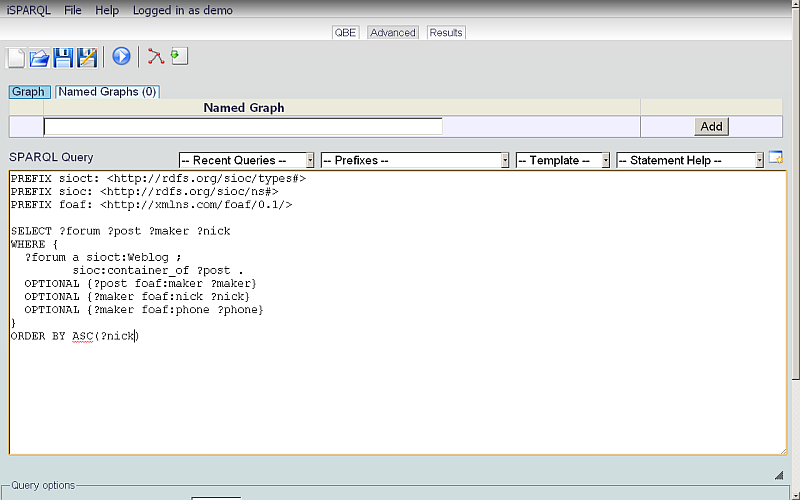
- Now in the SPARQL Query Working area of the Advanced tab, add a new optional node to the query for foaf:phone.
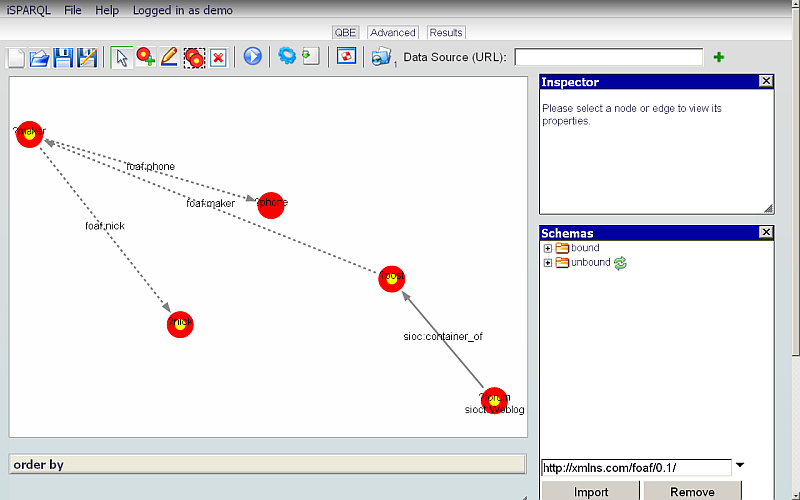
- To apply the query changes to the Graph model, click the "Visualize" button on the Advanced tab toolbar.

Setting Results Rows
- Go to the QBE tab.
- At the bottom of the page change in "Query options" the Resize site limit value, for ex.
to 10:

Adding a dataset
- On the QBE toolbar, click the Dataset button.
- Choose Type and enter a Data Source URI value.
- Click the Add button.

Other iSPARQL Features
Auto arrange the Graph Model
- Go to the QBE tab.
- Click the Auto arrange icon on the toolbar.
- The Graph model layout will be re-arranged to a more compact form.

Group selected nodes of the Graph Model
- Go to the QBE tab.
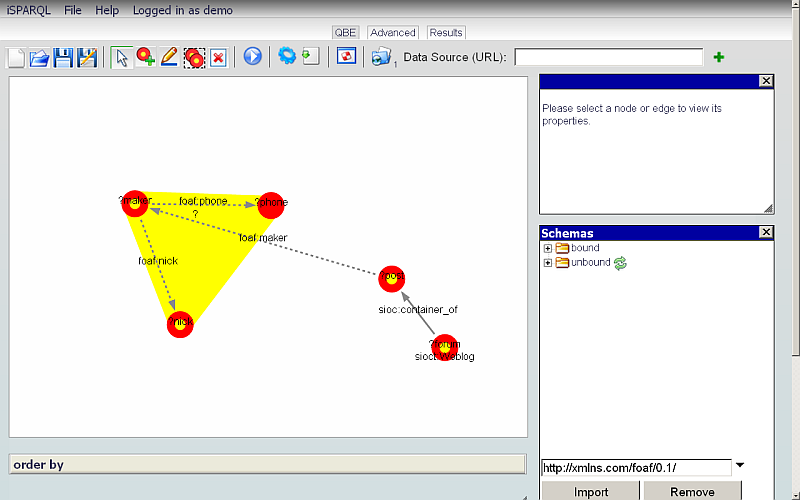
- Select several nodes from the Graph. You can do this by holding the "Shift" (on Windows) or "Command"/"Apple" (on Mac) key while clicking the nodes.
- Click the "Group Selected" icon from the toolbar.
- The selected nodes will be shown on the Canvas in one-color area as grouped.
You can use the Group pane which will be shown above the Schemas window to:
- Change the Group Type: Graph, Optional, Union or Construct
- Set the Group's ID label.
Add Named Graph(s) to the SPARQL query
- Click to the Advanced tab.
- Click to the Named Graph(s) sub-tab.
- In the form, enter a value for Named Graph, and click the Add button.
- The number of added Graphs will be shown, right-aligned to the Named Graph(s) sub-tab.
Add statement to the SPARQL query
- Go to the Advanced tab.
- You can add a statement to the SPARQL Query with
- the Statement Help drop-down list or
- the Statement Help button shown right after it.
- Click the button "Statement Help".
- Click on the desired statement name in the Statement Help window which appears.
Related
- iSPARQL Tutorials
- Basic iSPARQL Tutorial with query built from a blank canvas and pre-typed Nodes
- Basic iSPARQL Tutorial with query built from a blank canvas and Nodes dragged from the Toolbar
- iSPARQL Querying Tutorial with SPARQL Query type "CONSTRUCT"
- iSPARQL Querying Tutorial with SPARQL Query type "DESCRIBE"
- iSPARQL Querying Tutorial "DESCRIBE" with Google Maps View Results
- iSPARQL Querying Tutorial with SPARQL Query type "INSERT"
- iSPARQL Querying Tutorial with SPARQL Query type "DELETE"
- iSPARQL Querying Tutorial with SPARQL Query type "SELECT"
- OpenLink AJAX Toolkit (OAT)
Tagcloud
Category SPARQL Category RDF Category OpenSource Category OAT Category Tutorial Category DocumentationReferenced by...