Configure Progress Client Networking (Windows)
Use the following instructions to test the functionality of your Progress Client Networking or Progress SQL Access on Windows operating systems:
- Log in to the machine that contains your Progress client software.
- Open Notepad.
- Enter the following lines into Notepad, substituting your local values for the placeholders:
-S <Progress Service Name or port number>
-H <Progress hostname or IP address>
-N tcp
-db <your target database name>
For example:
-S pro91d
-H machine.example.com
-N tcp
-db isports
or
-S 6105
-H 192.168.123.231
-N tcp
-db sports92
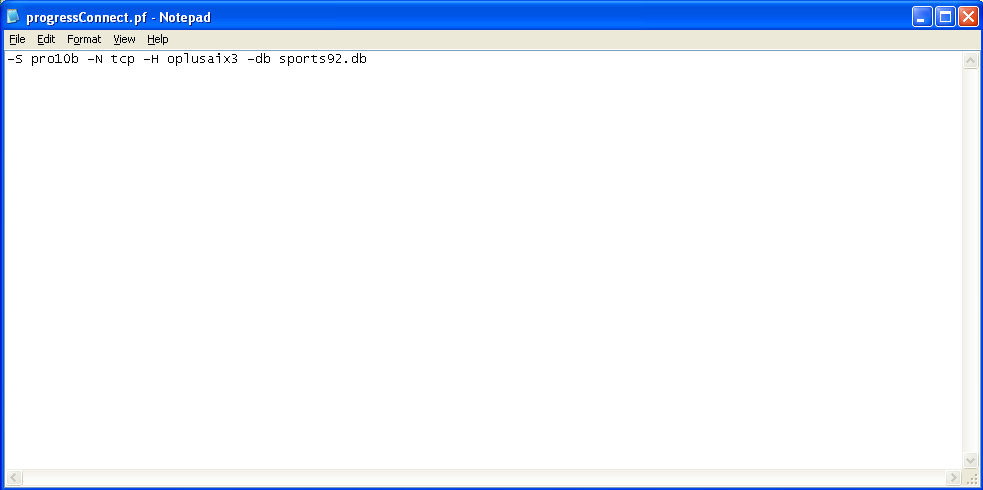
- Name the file progressconnect.pf and save it to C:\temp.
- Exit Notepad.
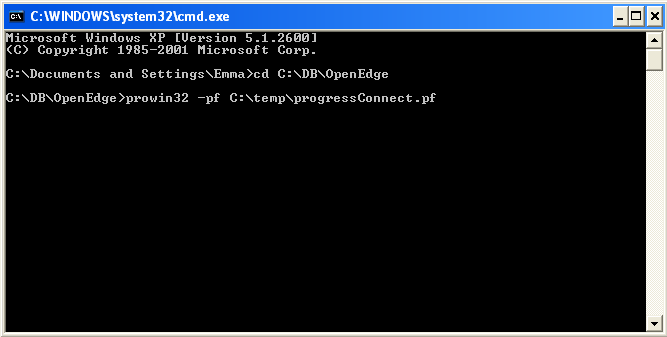
- Open an MS-DOS command prompt.
- cd into the bin sub-directory of your Progress installation.
- Run the following command:
prowin32 -pf C:\temp\progressconnect.pf
- Wait for the following dialog box to appear.
- Provide a username and password for your database if required.
- Click OK.
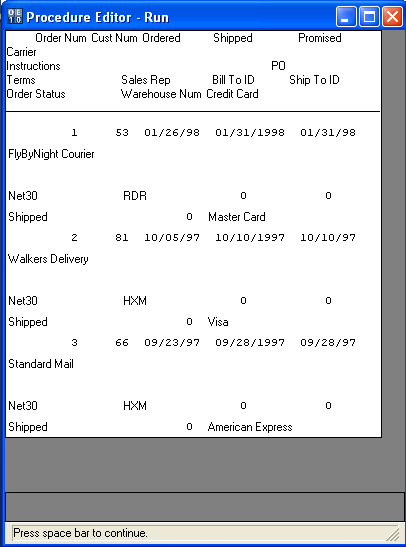
- Wait for the Procedure Editor window to appear.

- Expand the Tools menu.
- Select Data Dictionary.
- Use the Data Dictionary Tables list box to view the tables in the database.

- Close the Data Dictionary view.
- Type a SELECT statement in the main body of the Procedure Editor.

- Expand the Compile menu.
- Select Run.
- Confirm that the expected result set is returned.
CategoryDocumentation CategoryProgress CategoryUDA CategoryWindows