
Configure the Informix Native Client on Windows
Use the following steps to configure your Informix client on Windows operating systems.
- Log in to the machine that contains the Informix native client.
- Launch the Informix
SetNet32 utility from Start >> Programs >> Informix client folder.
- Click the Environment tab.
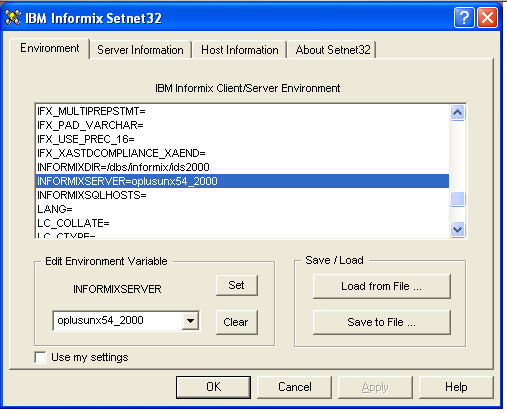
- Ensure that the following environment variables are set:
- INFORMIXDIR - The full path to the root of the local Informix client installation
- INFORMIXSERVER - The name of the target Informix server.
Must match $INFORMIXSERVER on the Informix host.
- INFORMIXDIR - The full path to the root of the local Informix client installation
- Click the Server Information tab.
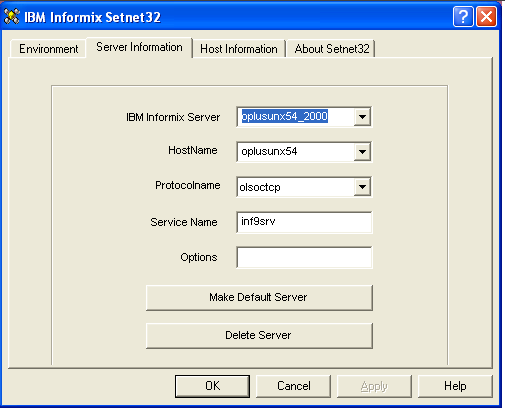
- Fill in these fields:
- IBM Informix Server: The Informix server name, same as the INFORMIXSERVER value above.
- Host Name: The fully-qualified host name or IP address of the Informix host machine.
- Protocol Name: Leave the default olsoctcp entry set unless we (or Informix Support) instructs you otherwise
- Service Name: The Informix socket name as set in the Windows TCP/IP services file, C:\WINDOWS\System32\Drivers\etc\services or C:\WINNT\System32\Drivers\etc\services.
This services entry must match the entry on the Informix host.
- Options: Leave this field blank.
- IBM Informix Server: The Informix server name, same as the INFORMIXSERVER value above.
- Click the Host Information tab.
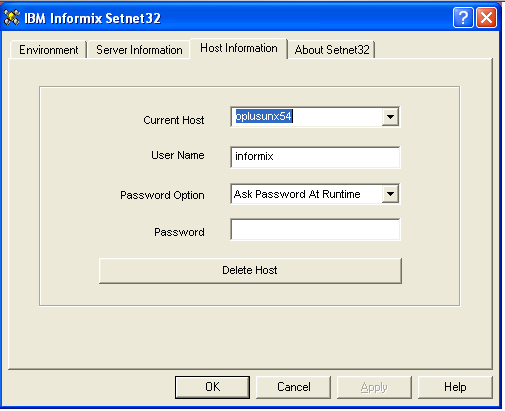
- Fill in these fields:
- Current Host: This should match the Host name on the Server Information tab.
- User Name: A valid user name for the database to which you are trying to connect.
- Password Option: Choose the appropriate password option for your target database.
- Password: Fill this in if you opted to authenticate with a password.
- Current Host: This should match the Host name on the Server Information tab.
- Click Apply.
- Click OK.
Test your configuration
- Launch the Informix
iLogin Demo from Start >> Programs >> Informix client folder.
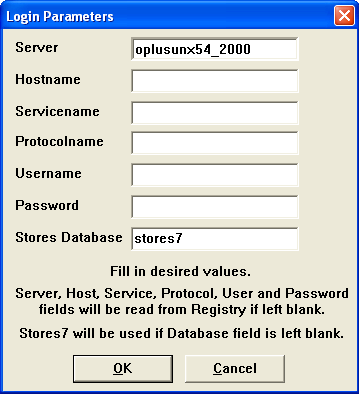
- Drill down to File >> Run.
- Enter the same authentication parameters that you entered above in
SetNet32.
- Click OK.
- Successful connections result in database information being displayed on screen.