Configuring the Virtuoso Client ODBC Driver on Windows
- Open the ODBC Data Source Administrator from Control Panel -> System and Security -> Administrative Tools.
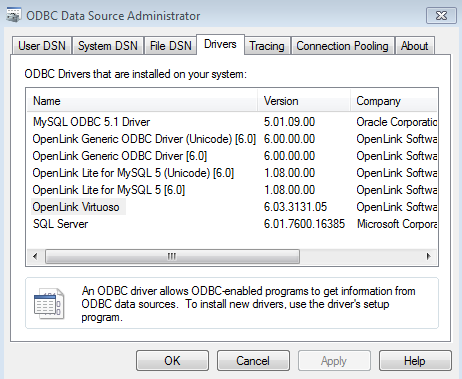
- Select the Drivers tab to see a list of all available ODBC Drivers.
One of these will be OpenLink Virtuoso.
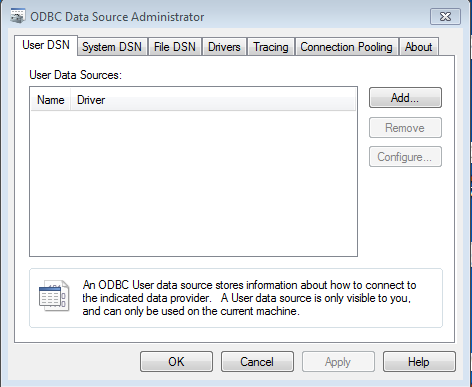
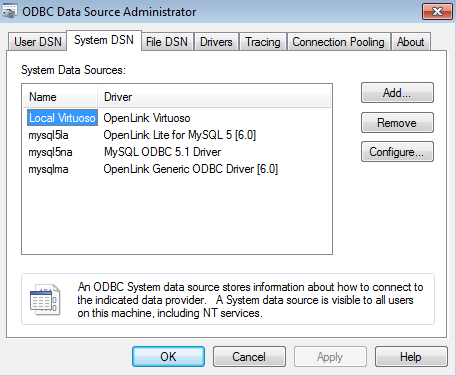
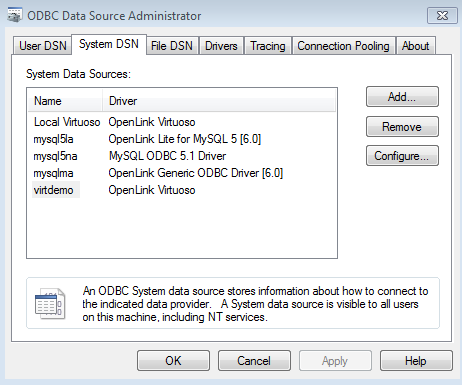
- Select the System DSN tab to see the available Data Source Names (DNSs), one of which should now be Local Virtuoso.
Select the existing Local Virtuoso DSN and click Configure to edit the defaults, or click Add to create a new DSN.
- If you chose to Add a DSN, the Create Data Source dialog will be presented; select the OpenLink Virtuoso ODBC Driver, and click Finish.

- The first setup panel prompts for a DSN name and description, and basic connection information about the target Virtuoso Server instance(s).
Click Next when all desired options are set.
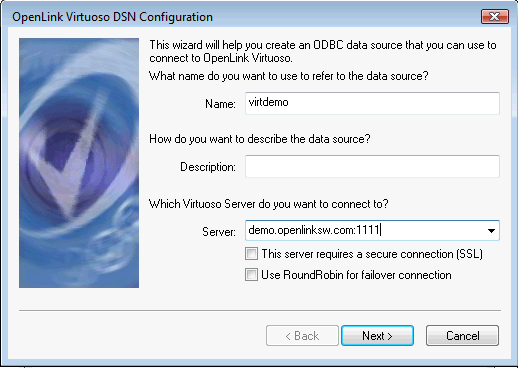
- Name - (Required) A brief and meaningful title for your Data Source Name
- Description - (Optional) A longer description of your Data Source Name
- Server - (Required) Select the drop down list box to invoke the driver's dynamic discovery of Virtuoso instances on the network and choose the desired instance.
- This server requires a secure connection (SSL) - If this box is ticked, the driver will demand an SSL encrypted connection to the target Virtuoso instance(s).
If a targeted instance is not configured for or capable of SSL connections, the connection will fail.
This setting is not needed for connections to Virtuoso instances which are configured to demand SSL connections from clients; such demands are handled automatically by the driver.
- Use RoundRobin for failover connection - Enables load-balanced connections to clustered instances, when Server has multiple target <host>:<port> entries.
- The next setup panel prompts for authentication details.
Click Next when all desired options are set.
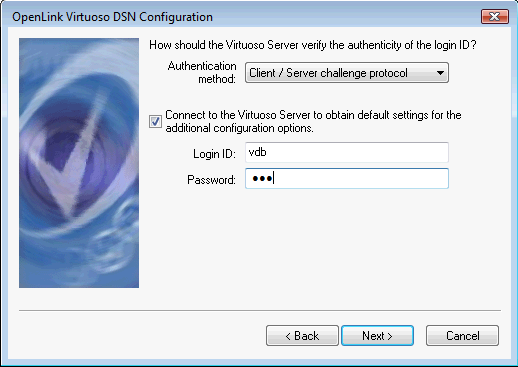
- Authentication method - Select Client/Server challenge protocol, encrypted password, or plaintext password
- Connect to the Virtuoso Server to obtain default settings for the additional configuration options - Check to poll the target Virtuoso instance regarding settings on following setup panels.
- User name - The Virtuoso username.
(For demo.openlinksw.com:21118 tests, use vdb here.)
- Password - The Virtuoso password.
(For demo.openlinksw.com:21118 tests, use vdb here.)
- The next setup panel prompts for various optional details.
Click Finish when all desired options are set.
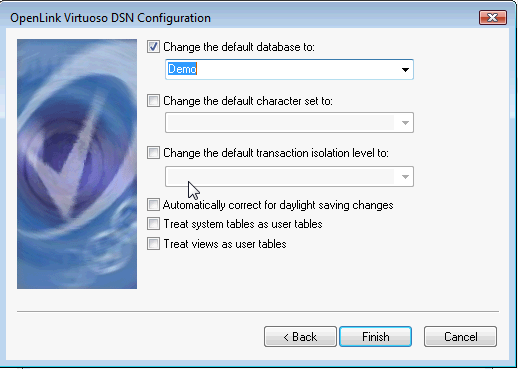
- Change the default database to - Select the desired initial database schema.
- Change the default character set to - Select the desired character set.
- Change the default transaction isolation level to - Select the desired transaction isolation level.
- Automatically correct for daylight savings changes - Check to ensure that time data values are adjusted to counter the effects of daylight saving.
- Treat system tables as user tables -
- Treat views as user tables -
- The Data source name is now successfully added or configured and ready for use.
Next...