
Installation and Configuration of the Lite Edition (Single-Tier) ODBC Driver for Sybase Data Sources, for Mac OS X
Review Preinstallation Documentation: Pre-Installation Requirements
Installation
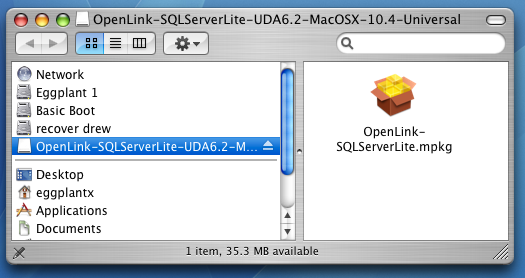
- The Lite Edition (Single-Tier) ODBC Driver for Sybase for Mac OS X is distributed in a single disk image (.dmg) file, which contains a Macintosh Installer mpkg.
- Double-click the mpkg to start the installation process.
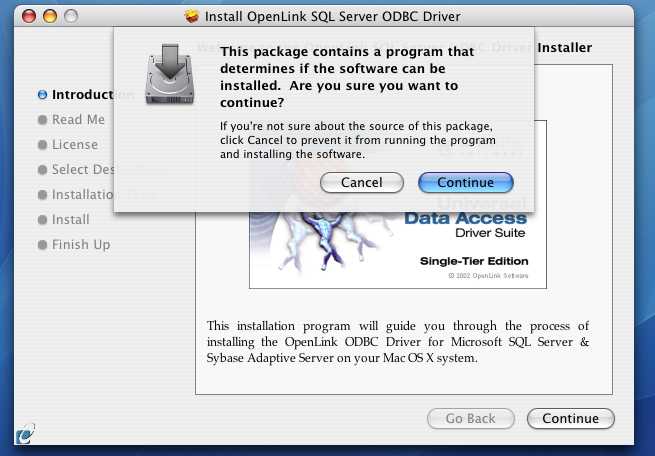
- You will encounter a warning message that will ask you if you are sure that you want to install the software.
Click Continue.
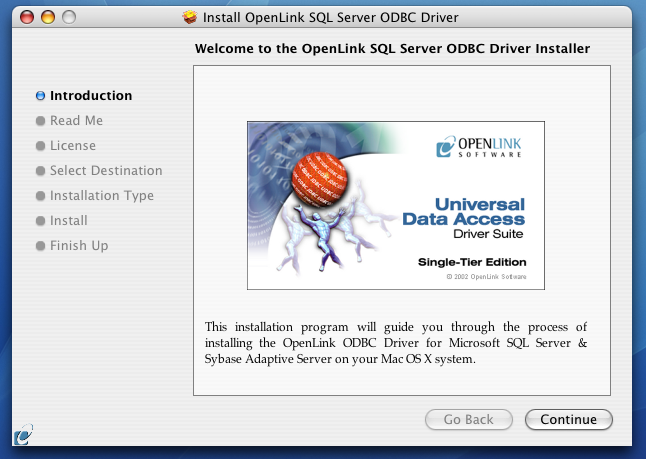
- The installer will display a Welcome message.
Click "Continue."
- The next screen will display the Read Me file, including any last- minute updates to these documents.
Please read carefully and click "Continue" when finished.

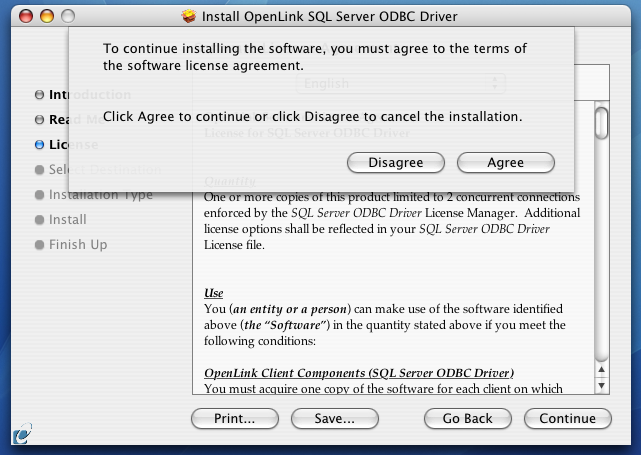
- The next screen will display the License Agreement.
Please read and click "Continue."

- You will be prompted to "Agree" to continue the installation or "Disagree" to abort.
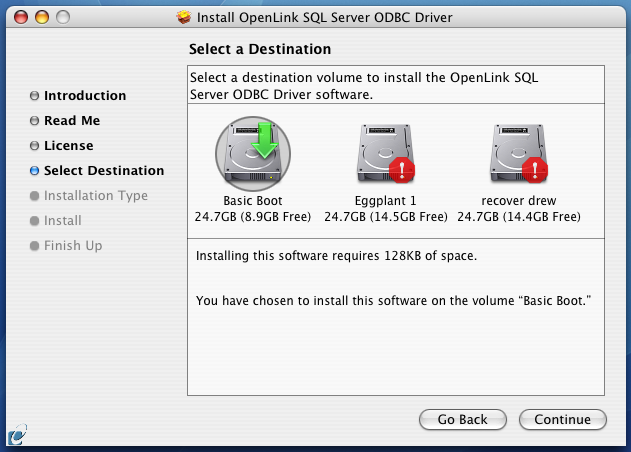
- You will be asked to select a Destination Volume.
Generally, this should be your Mac OS X boot volume.
Click on the desired disk icon and then click "Continue."
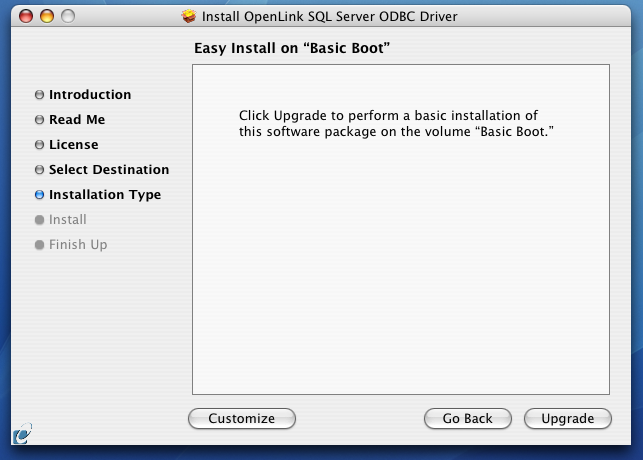
- You may now choose the Easy Install, or if you are an experienced user, you may Customize which components are installed.
OpenLink generally recommends the Easy Install.
- If you have installed
OpenLink or iODBC components in the past, click "Upgrade" to continue; otherwise, click "Install."
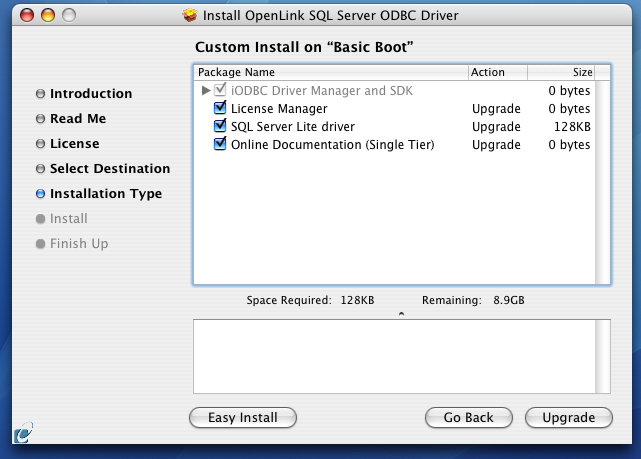
- If you chose the custom option, select which of the following components to install.
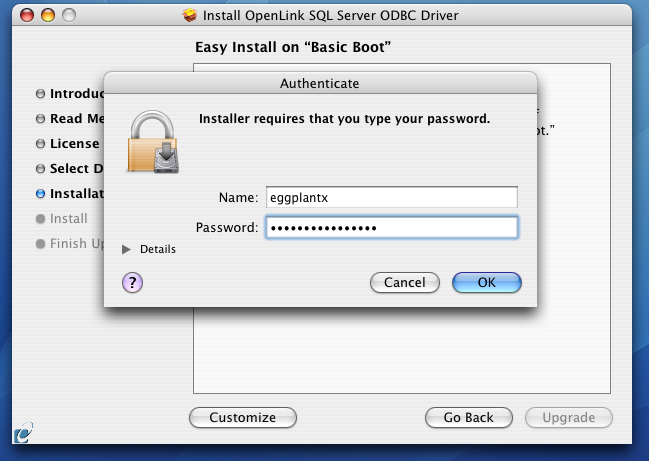
- You must have an Administration username and password to install the
OpenLink driver. Enter your Mac OS X Username and Password.
- You will be shown a graphical progress bar as the Installation progresses, followed by System Optimization.
- After the driver has been installed, you will be prompted to locate a license file.
NOTE -- If a correctly named file already exists in $OPL_LICENSE_DIR, /Library/Application Support/openlink/bin/, you will not see this dialog. If the existing file is not valid (evaluation has expired, it's for a different OS, it permits insufficient processor cores, etc.), you will need to manually apply a valid license file after installation is completed.
NOTE -- In some environments, this dialog may be hidden by the Installer.app or other windows on your Mac. Please minimize, hide, and/or move windows until you can see and act on this dialog. If you do not answer this dialog, the installation will not complete properly, and the driver will not function as desired.
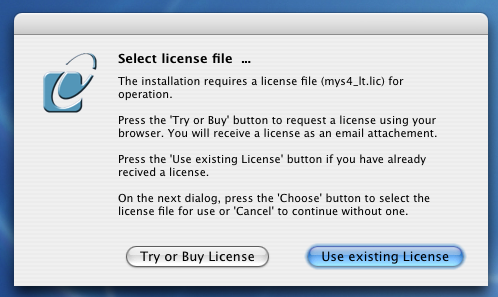
- If a license file already exists on the machine, select the 'use existing' option.
(Previously generated license files may be re-downloaded from your ODS-Briefcase data space.)
- If you need to obtain a new trial or permanent license file, select the 'try or buy' option, which will load a relevant web page from which you can obtain a license file.
- If a license file already exists on the machine, select the 'use existing' option.
(Previously generated license files may be re-downloaded from your ODS-Briefcase data space.)
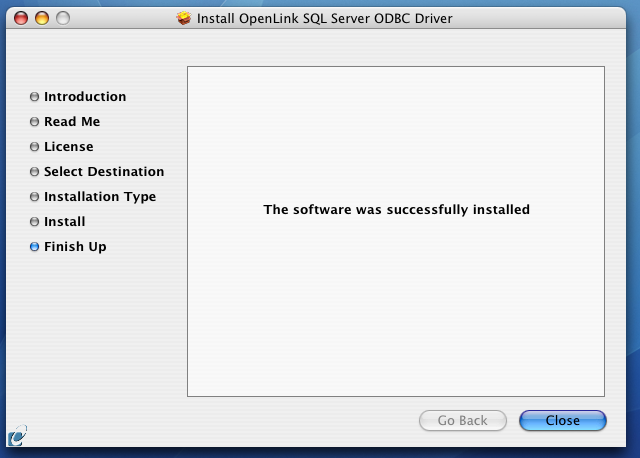
- When the process is complete, you will be told that the software was successfully installed.
Click "Close" and your new database driver for ODBC is ready for use.
Configuration
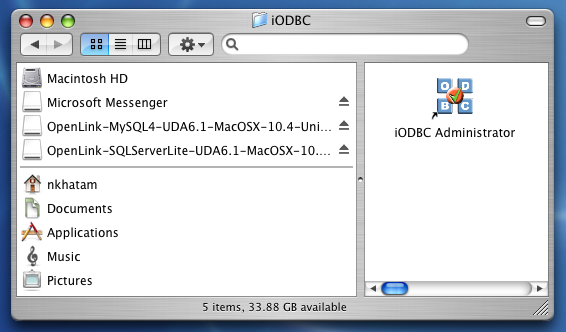
- To configure an ODBC DSN, run the
OpenLink iODBC Administrator located in the /Applications/iODBC folder:
- Click the System DSN tab:

- Click the Add button.
Then, select the
OpenLink SQL Server Lite Driver from the list of available drivers. Select the Unicode version of the driver if and only if you are working with multi-byte character sets, as unnecessary translations can significantly affect ODBC performance:
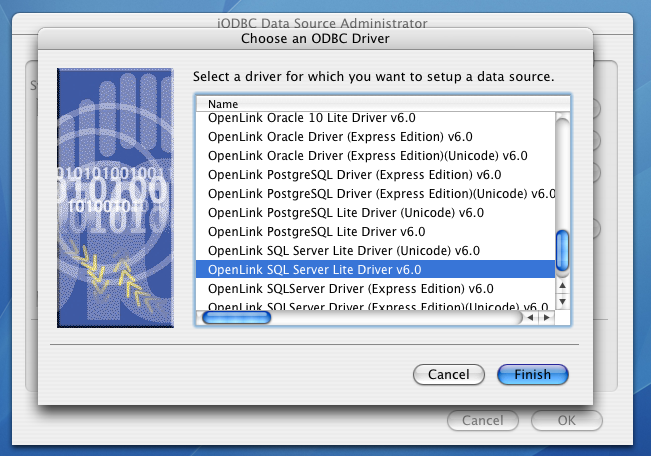
- Click Finish.
- The Data Source tab prompts for a DSN name, description, and information that identifies the target Sybase DBMS.
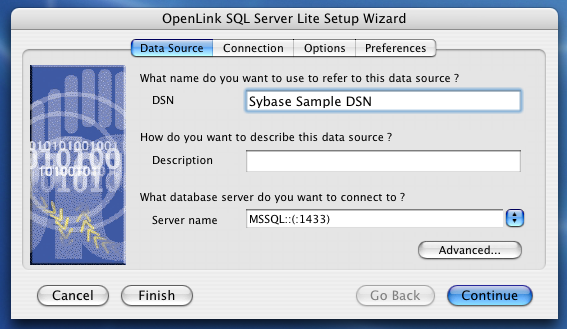
- DSN - A brief and meaningful title for your Data Source Name
- Description - An optional description for your Data Source Name
- Server Name - Use the advanced button to configure this setting
- DSN - A brief and meaningful title for your Data Source Name
- Use the "Advanced" button to pass parameters that identify your Sybase instance.
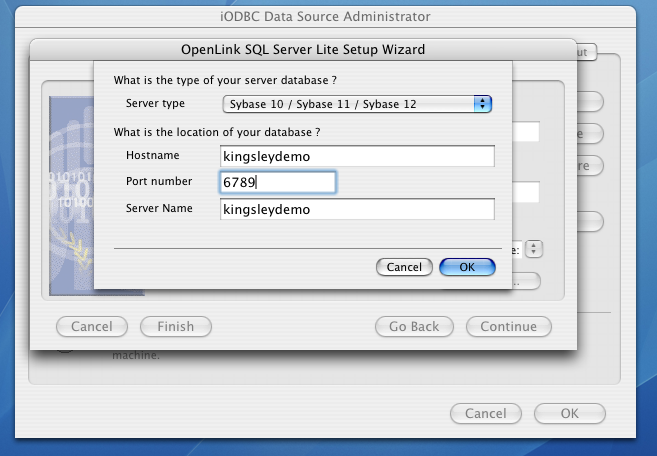
-
Server Type - An OpenLink proprietary parameter that associates the connection with a particular TDS version.
- Hostname - The hostname or IP address on which Sybase listens
- Port number - The TCP port on which Sybase lists
- Server Name - Sybase instance name
- Mirror Host - Microsoft SQL Server only
- Use strong encryption of data - Enable SSL encryption of data between driver and database
- Use Mars - Microsoft SQL Server only
- Verify Server Certificate - Verify the Database Server SSL certificate against the one specified in the "CA file" field
- CA file - Specify the location of a Valid SSL Certificate for use during the connection
-
- Click OK to continue.
- The Connection Tab takes a combination of required and optional parameters required to make a connection to the target database:
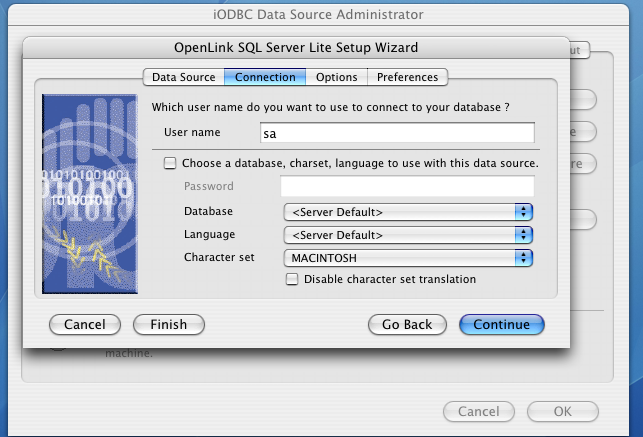
- User name - A valid Sybase user name
- Choose a database, charset, language to use with the data source -
- Password - A valid Sybase password
- Database - The Sybase database
- Language -
- Character set -
- Disable character set translation -
- User name - A valid Sybase user name
- Click Continue.
- The Options tab enables you to set some standard and Sybase specific parameters.
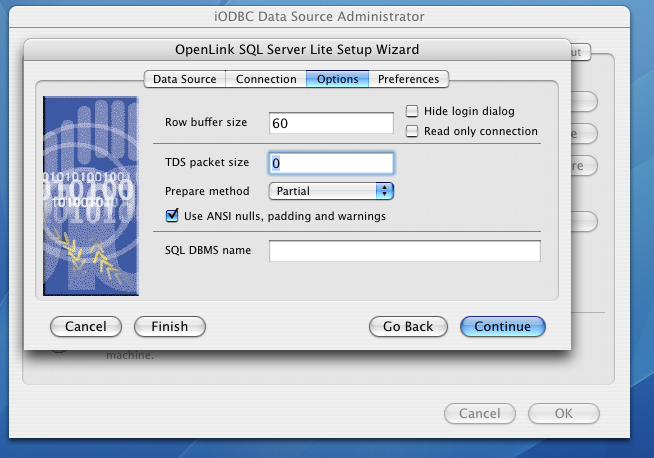
- Row Buffer Size - This attribute specifies the number of records to be transported over the network in a single network hop.
Values can range from 1 to 99.
- Hide Login Dialog - Suppresses the ODBC "Username" and "Password" login dialog boxes when interacting with your ODBC DSN from within an ODBC compliant application.
- Read Only connection - Specifies whether the connection is "Read-only." Make sure the checkbox is unchecked to request a "Read/Write" connection.
- TDS packet size - A value that determines the number of bytes per network packet transferred from the database server to the client.
The correct setting of this attribute can improve performance.
When set to 0, the initial default, the driver uses the default packet size as specified in the Sybase server configuration.
When set to -1, the driver computes the maximum allowable packet size on the first connect to the data source and saves the value in the system information.
When set to x, an integer from 1 to 10, which indicates a multiple of 512 bytes (for example, Packet Size of 6 means to set the packet size to 6 * 512 equal 3072 bytes).
For you to take advantage of this connection attribute, you must configure the System 10 server for a maximum network packet size greater than or equal to the value you specified for Packet Size.
- Prepare Method- This option is specific to the TDS Driver for Microsoft & Sybase SQL Servers.
It can take the values None, Partial Full (connectoptions -O [0, 1, 2] respectively).
It is used to determine whether stored procedures are created on the server for calls to SQLPrepare.
More
- No Quoted Identifiers- This option indicates that the underlying driver does not support quoted identifiers, which is required for Jet engine based products like Microsoft Access.
- Use ANSI nulls, padding and warnings- This option affects TDS agent & Lite Driver connections to Microsoft SQL Server databases.
Sybase connectivity is not affected.
More
- Map Serializable to Snapshot isolation level - Microsoft SQL Server only
- SQL_DBMS Name - Manually overrides the
SQLGetInfo(SQL_DBMS_NAME) response returned by the driver. This is required for products like Microsoft InfoPath for which the return the value should be "SQL Server".
- Row Buffer Size - This attribute specifies the number of records to be transported over the network in a single network hop.
Values can range from 1 to 99.
- Click Continue to view additional preferences that can be set for the connection.
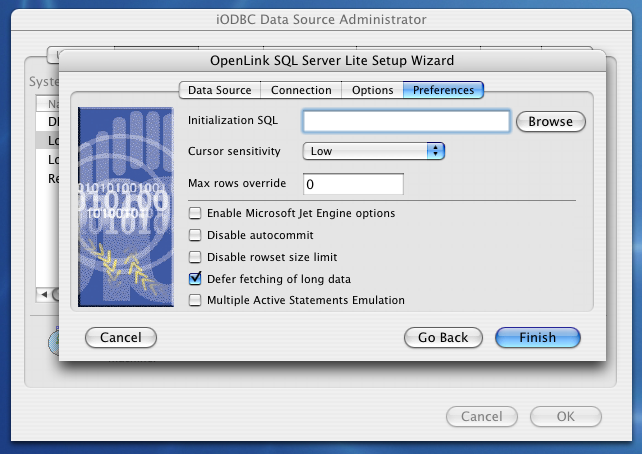
- Initialization SQL - Lets you specify a file containing SQL statements that will be run automatically against the database upon connection.
- Cursor Sensitivity - Enables or disables the row version cache used with dynamic cursors.
When dynamic cursor sensitivity is set high, the Cursor Library calculates checksums for each row in the current rowset and compares these with the checksums (if any) already stored in the row version cache for the same rows when fetched previously.
If the checksums differ for a row, the row has been updated since it was last fetched and the row status flag is set to SQL_ROW_UPDATED.
The row version cache is then updated with the latest checksums for the rowset.
From the user's point of view, the only visible difference between the two sensitivity settings is that a row status flag can never be set to SQL_ROW_UPDATED when the cursor sensitivity is low.
(The row status is instead displayed as SQL_ROW_SUCCESS.) In all other respects, performance aside, the two settings are the same.
Deleted rows don't appear in the rowset.
Updates to the row since the row was last fetched are reflected in the row data, and inserted rows appear in the rowset, if their keys fall within the span of the rowset.
If your application does not need to detect the row status SQL_ROW_UPDATED, you should leave the 'High Cursor Sensitivity' checkbox unchecked, as performance is improved.
The calculation and comparison of checksums for each row fetched carries an overhead.
If this option is enabled, the table oplrvc must have been created beforehand using the appropriate script for the target database.
-
MaxRows Override - Allows you to define a limit on the maximum number of rows to be returned from a query. The default value of 0 means no limit
- Enable Microsoft Jet Engine options -
- Disable
autocommit - Changes the default commit behaviour of the OpenLink driver. The default mode is AutoCommit (box unchecked).
- Disable rowset size limit - Removes
OpenLink's default 100 rowset restriction
- Defer fetching of long data - Defers fetching of LONG (BINARY, BLOB etc.) data unless explicitly requested in a query.
This provides significant performance increases when fields in query do not include LONG data fields.
- Multiple Active Statements Emulation -
- Initialization SQL - Lets you specify a file containing SQL statements that will be run automatically against the database upon connection.
- Click the Finish button to save your new Data Source Name.
Next...
- Test your DSNs with our sample program.
- If anything isn't working as you expect, including errors resulting from the test above, see our Troubleshooting Resources.
- Should you decide to purchase a commercial license at the end of your evaluation period, be sure to consult our documentation which explains the placement and uptake of commercial license files and the use of our
OpenLink License Manager technology: License Technology & Application.