Installation and Configuration of the Enterprise Edition (Multi-Tier) Generic Client ODBC Drivers, on Windows
Review Preinstallation Documentation: Enterprise Edition (Multi-Tier) ODBC Client Components
Installation
- Our Enterprise Edition (Multi-Tier) Generic ODBC client is distributed in a single Windows MSI file.
Simply run the appropriate installer for x86, x86_64 (Opteron, Xeon, other families), or IA_64 (Itanium family).
You should see the following Welcome message:

- The next screen will display the License Agreement for use with our Enterprise Edition (Multi-Tier) Driver product.
Please read this.
If you agree, check the accept checkbox and continue:

- Choose the type of installation to perform, noting that typical and complete will immediately install the default or complete components respectively.
Otherwise, select the custom option, which enables you to pick and choose options to install:
- Use this dialog to specify the installation directory, if you chose the custom installation option:
- You can choose which options to install, if you chose the custom installation option:
- A final confirmation screen is displayed for your review prior to performing the installation:
- The installer status bar indicates the progress and status of the the installation:
- If the installation is successful, a final dialog will be displayed indicating this:
Configuration
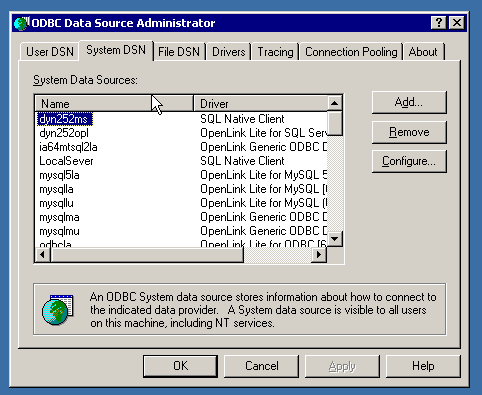
- Launch the ODBC Administrator appropriate to the bitness (32-bit or 64-bit) of your client application and driver.
- Click the Add button that appears on the System DSN tab.
- Select the
OpenLink Generic ODBC Driver v6.0 from the list of available drivers. Select the Unicode version of the driver if and only if you are working with multi-byte character sets, as unnecessary translations can significantly affect ODBC performance: 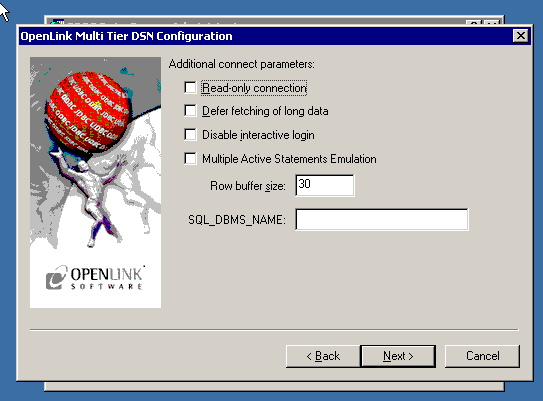
- Click Finish.
- The first DSN configuration dialog takes these values:
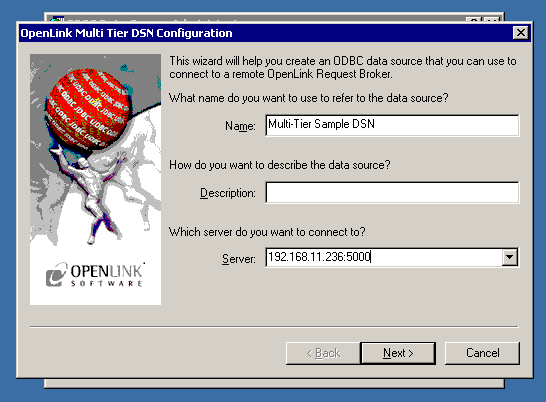
- Name: A suitable name for your Data Source
- Description: An optional description for your Data Source
- Server: The host name or IP address of the machine containing your
OpenLink Request Broker and the Broker's listen port. A colon separates the two. For example: 192.158.12.234:5000.
- Name: A suitable name for your Data Source
- Click Next.
- The second DSN configuration dialog takes these values:

- Domain - The value must match a [Domain Alias], which is contained in the Server's Session Rules Book.
This Alias typically represents the name and version of an
OpenLink Agent. That agent version may differ from the DBMS version to which it connects. Note that advanced users may create custom domain names that follow their own, desired conventions. - Database - Takes a database name or Oracle SID.
- Options - This field passes parameters that enable users to connect to
MySQL, PostgreSQL, SQLServer, and Sybase databases anywhere on the network. It also passes parameters that enable users to connect to any DBMS that does not reside on the same machine as the OpenLink Request Broker and Agent. Review Complete Settings and Usage for Connect Options - Secure Connection - If checked, the client sets up a secure connection to the Request Broker.
- Connect now to verify that all settings are correct - Will attempt to connect to the database, once you click Continue.
- Login ID - A valid database uid.
- Password - A valid database password.
- XA Info - Refer to
OpenLink's extensive Distributed Transaction Processing documentation for use of this field.
- Domain - The value must match a [Domain Alias], which is contained in the Server's Session Rules Book.
This Alias typically represents the name and version of an
- Click Next.
- The third tab contains settings that are not required for a basic connection:
- Read Only connection - Specifies whether the connection is "Read-only." Make sure the checkbox is unchecked to request a "Read/Write" connection.
- Defer fetching of long data - Defers fetching of LONG (BINARY, BLOB etc.) data unless explicitly requested in a query.
This provides significant performance increases when fields in query do not include LONG data fields.
- Disable interactive login - Suppresses the ODBC "Username" and "Password" login dialog boxes when interacting with your ODBC DSN from within an ODBC compliant application.
- Multiple Active Statements Emulation - Enables use of Multiple Active statements in an ODBC application even if the underlying database does not allow this, as it is emulated in the driver.
- Row Buffer Size - Specifies the number of records to be transported over the network in a single network hop.
Values can range from 1 to 99.
- SQL_DBMS_NAME - Manually overrides the SQLGetInfo(SQL_DBMS_NAME) response returned by the driver.
This is required for products like Microsoft
InfoPath (for which the return the value should be "SQL Server").
- Read Only connection - Specifies whether the connection is "Read-only." Make sure the checkbox is unchecked to request a "Read/Write" connection.
- Click Next.
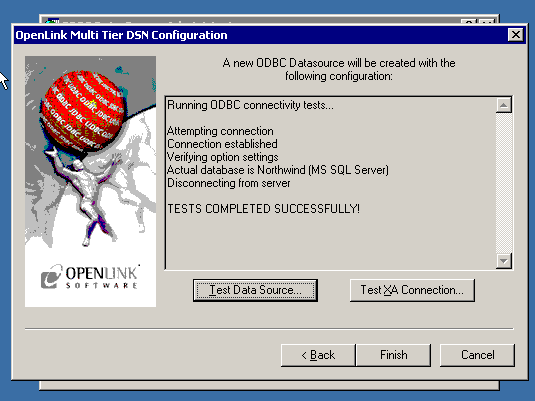
- Click on the 'Test Data Source' button to make a connection to the database to verify connectivity:
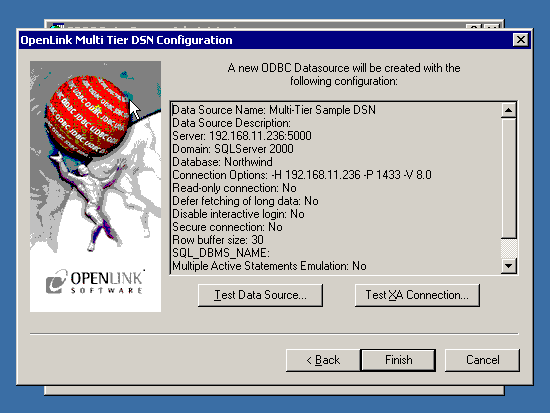
- A successful connection to the database has been made: